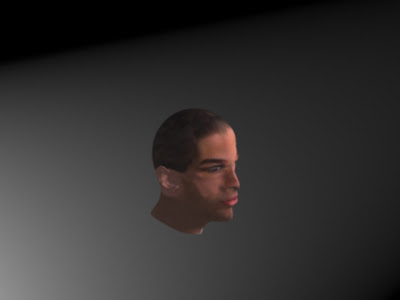
From the very beggining i had encountered problems with my photos. At first i had taken my photos using a digital SLR for a clearer picture. When inputting the photo into photoshop i noticed there was a high degree of barrel vision. I had spent considerable amount of time trying to rectify the problem but the barel vision still remained. To remedy the problem i had to take the pictures again using a a more primitive digital camera. The camera managed to take the picture without any barrel vision however i had to deal with a picture with a small resolution.
Topology
After watching the tutorial i had started to draw in the topology on both sides of my face, I found it quite hard to draw the lines in with a mouse so i had borrowed my friends graphic tablet. The graphic tablet was extremely beneficial however the graphics tablet records pressure so i had lines which were both t
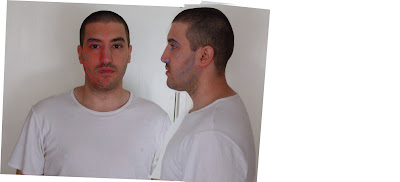 hick and thin. The topology took an extremly long time as i was constantly deleting lines. Having never done this process before i was trying too hard to achieve topological lines which were similar to the one on the tutorial. This proved a problem because i had started drawing in lines which should have never existed. After much time erasing and re drawing i finally had a picture to use within 3DS Max.
Plane setup
I found this statge quite easy, i think this was because the tutorial had done well in explainging the process. I did have a problem with the resoution of the picture on the plane but after a little help this had been remedied.
Splines Splines Splines
This was the second most tedious process, at this stage i realised that somed of the topology lines i drew in should never had existed. This meant that i had to create splines in blind places to minimise the risk of pinches.
Puuuuuuuuuulllllllllllllllllllling Out
This had been the most tedious process in the whole project. I felt that i did not do well in this process as i should have. During this process i noticed that the welding of the vertices was not consistent through out the whole model, this meant that i had to go over the model and weld vertices together. This took a considerable amount of time and fealt never ending. At around 2am i had finally had a whole model but then realised that there was too many splines in the model. On the next day i had to start removing splines and vertices to remove bumps, pinches and just general gongestion. This process had taken 3 days, i had realised that i had essentially replaced nearly every edge when i could have just started again.
Nose and Lips
I could not achieve the nose i wanted, i felt that the nostrils were too large. The lips had taken me a long time, the most tie was spend getting them to weld to the side of the mouth. After much tweeking again i could not achieve the lips i wanted, i felt that they were to pointy.
Turbo smoothing
After applying the turbo smoth modifier i had noticed that there was a lot of pinching, this was caused due to vertices existing across edges by them selves. It was a relatively easy process to remove these unwanted splines.
Rest of the Head
Once i was happy with the face i started on the top of the head, folowing the tutorial i had created a sphere and then reduced the amount of segments to match that of the top of my face, i felt that this was extremely important in achieving a smooth forehead to top head ratio. After scaling the spher in all directions i was happy with a top head.
Neck
I started at the bottom of the face and started creating more quads to go underneath the mouth and jaw. By using the reference plates this proces was realtively simple as there is not much definition in the neck area. I had continued this process until i reached the back of the head (sphere). I had to remove splines and vertices in order to weld the neck to the head. I was quite worried that this would create a lot of pinching but to my surprise it was fine.
Ear
After drawing in the topology for the ear i had started to create the splines, the creation of splines was relatively easy however the process got increasingly harder when i had to start gving depth a definition to the ear. Working till late at night i found myself tweeking the ear to make it look a least human. After much time spent i was happy with a model but due to time constraints i would have prefered to spend more time on the ear.
Attaching the Ear
While creating the ear i had watched further along the tutorial regarding attaching. This helped a considerable amount as when creating the ear i had though about the faces on the side of the head. When attaching the ear i found it quite easy as all i had to do was weld the vertices together without the need for moving around any edges.
UVW Coordinates
At this stage i had fell ill with the flu, after getting better i felt that i did not have anytime to complete this stage, luckly i only had a bit of pulling around the back of my neck near the bottom.
Texture Painting
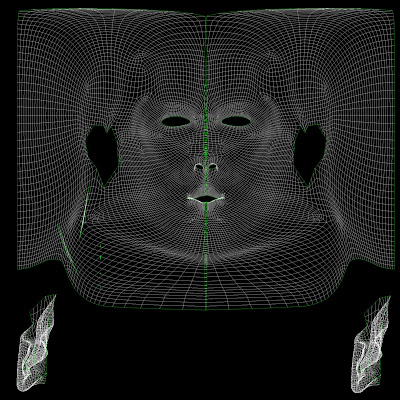
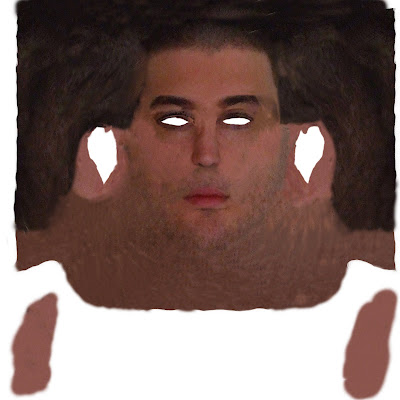
After exporting my guide lines into photoshop, i had strarted to paint underneath the guide lines, i felt this to be a tedious process as there was a lot of scaling, patching and cloning. Due to time constraints i felt that i could not acheive the results i wanted.
Conclusion
Throughou
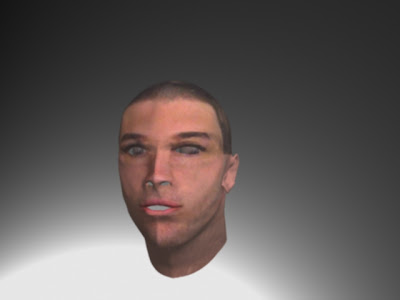 t this project I had learnt so many skills and feel that if i have another chance to do this again (i think i we do it next semester) then i will definately be more prepared and know how long each stage should take, one thing that really got to me was that I had used a lot of splines for the topolgy but i learnt that if you map out the basic shape then when you turbo smooth the modifier will add in the vertices and splines needed.